So, you’re eager to try your hand at DIY nail art, but where do you begin? Don’t worry; we’ve got you covered! In this article, we’ll walk you through the essential nail art tools you’ll need to create stunning designs from the comfort of your own home. Whether you’re a complete beginner or already have some experience, these tools will help take your nail art game to the next level.
1) Nail Polish
Let’s start with the basics – nail polish. To achieve flawless nail art, you’ll need a base coat to prevent nail discoloration and ensure smooth application, a high-quality nail polish in your chosen color, and a top coat to extend the longevity of your manicure. While a quick-drying top coat is convenient, having a regular top coat or clear polish on hand is also beneficial for more intricate designs. Investing in good quality nail polish from reputable brands such as Orly, OPI, China Glaze, Sally Hansen, and Essie is crucial. Although they may be a bit more expensive, they last longer, dry faster, and don’t become lumpy like cheaper alternatives. If you’re uncertain about a brand, try a small sample before purchasing.
2) Nail Dotters
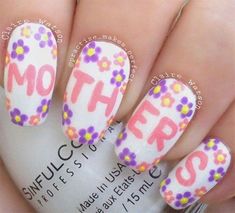
Nail dotters are fantastic tools for creating cute dot and circle patterns on your nails. They come in different sizes, but as a beginner, it’s best to start with one that has a medium-sized round nib on one end and a smaller one on the other. Here’s how you can use them: drop a few dots of nail polish onto a plastic sheet or a sturdy, disposable surface like an old ID card. Dip the round nib of the dotter into the polish and practice creating dots on the sheet until you achieve the desired size and consistency. Then, simply apply the dots onto your nails. Remember not to apply too much pressure, as it can distort the shape of the dots. After each use, clean the dotter thoroughly to prevent rusting.
Nail stripers are essential tools for painting precise lines and adding artistic flicks of color to your designs. Unlike regular nail polish brushes, stripers come with a long, thin brush that allows for more control. Start with white and black stripers as they are versatile colors to experiment with. Look for brands like LA Colors that offer a broad range of colors at an affordable price. If you want to try different colors without purchasing new polishes every time, consider getting a nail striper brush. However, be cautious as not all brushes are suitable for nail polish. Some may ruin the brush hairs. If you’ve used nail polish, use acetone, soapy water, and a paper towel to clean your brush. Alternatively, water-based nail paint is easier to clean off the brushes.
4) Stationery Tape
Have you ever wondered how DIY nail artists achieve perfectly straight lines and stripes? The answer is simple – stationery tape. Normal scotch tape works fine, but you can experiment with different types to find what works best for you. Stationery tape is excellent for creating precise lines and geometric shapes on your nails. Cut the tape into the desired length and shape, apply it to your nails, and paint over it. It’s as easy as that! Here are some helpful tips when using stationery tape: ensure your base nail polish is completely dry before applying the tape, cut the tape before painting your nails to avoid smudging with wet nails, place the tape where it can be easily removed without sticking to your nails, use tweezers to remove the tape carefully, and if you make a mistake, use a nail art brush to touch up the area.
If you’re serious about nail art, investing in a set of quality nail art brushes is highly recommended. There are various types of brushes available, including fan-shaped brushes, flat brushes, flat angled brushes, thin brushes for intricate details, and long stripers. You can find affordable brush sets like the Package Monster New Pro 20pc Nail Art Design Brushes on Amazon, which even includes a dotter. However, if you’re just starting out or don’t have nail art brushes on hand, you can still achieve great results with a regular paintbrush. Simply trim the brush to your desired shape and use it as a substitute for a nail art brush. It’s a convenient and cost-effective alternative for beginners.
Now that you’re familiar with the essential nail art tools, it’s time to let your creativity shine. Experiment with different colors, patterns, and techniques, and most importantly, have fun with it! Happy DIY nail art-ing!