Summer is all about embracing the sun and enjoying the vibrant colors that come with the season. And what better way to showcase your summer spirit than with a stunning set of ombre nails? This year, the options are endless when it comes to creating fun and eye-catching designs that celebrate the bright colors of summer. In this article, we’ll guide you through three different ombre nail designs that will help you rock summer in style. So grab your supplies and get ready for some nail art fun!
What exactly are ombre nails?
Ombre nails are a popular type of manicure that involves blending two or more colors to create a gradient effect. The word “ombre” is derived from the French word for “shadow”, and it perfectly describes the light-to-dark transition that is characteristic of this nail art style. Ombre nails have been around for a while and continue to be a favorite choice among nail enthusiasts. They are an excellent way to add fun and flair to your look, especially during the summer months.
Creating ombre nails is relatively simple, and one popular method involves using tape. After applying a base coat, you can use strips of tape to create a desired pattern on your nails. Then, paint the entire nail with the lightest color and allow it to dry. Once dry, carefully remove the tape to reveal the darker color underneath. To finish the design, apply a top coat to seal in the ombre effect.
The beauty of ombre nails is that you can experiment with different color combinations and patterns. Pair a light shade with a dark one or try gradient shades of a similar color for a chic look. You can even play around with the placement of the colors and use various shapes and designs. Let your creativity run wild and have fun with your ombre nails!
How do ombre nails differ from traditional nail art designs?
Ombre nails are a unique type of nail art design that involves blending two or more colors to create a seamless transition. The concept of ombre nails took inspiration from the ombre hair trend, where hair color gradually transitions from dark to light. In the case of ombre nails, you can choose any colors you like, but bold and vibrant shades are particularly popular.
To achieve an ombre effect, paint one color on the top half of your nail and another color on the bottom half. Then, blend the two colors together in the middle to create a seamless transition. The result is a stunning gradient effect that adds a touch of personality and style to your nails. One of the best things about ombre nails is that they are relatively easy to create, making them a fantastic option for both nail art beginners and experts. So why not give them a try and let your nails shine this summer?
Tips and tricks for painting your nails in ombre style
To achieve flawless ombre nails, here are some essential tips to keep in mind:
Start with a light base color and gradually add darker shades as you move towards the tips of your nails.
Use a makeup sponge or a cotton swab to blend the colors together seamlessly.
Seal your hard work with a clear top coat to prevent smudging and fading.
By following these simple tips, you’ll be able to create beautiful ombre nails that will turn heads and last longer.
How long can you expect an ombre nail design to last?
On average, an ombre nail design can last for about two weeks before it starts to show signs of wear and tear. However, with a little extra care, you can extend the life of your ombre nails even further. Here are some tips to help your manicure last longer:
Be mindful of your hands and avoid activities that can put stress on your nails.
Protect your nails from harsh chemicals by using gloves during cleaning or household chores.
Keep your nails and cuticles moisturized to prevent them from becoming dry and brittle.
Give your nails a break if they start to look worn or faded, allowing them time to recover.
By following these tips, you can enjoy your beautiful ombre nails for an extended period.
Taking care of your ombre nails for long-lasting beauty
To ensure that your ombre nails stay beautiful and vibrant for as long as possible, here are some care tips to follow:
Keep your nails clean and dry to prevent the growth of bacteria or fungus.
Apply a clear base coat before applying color to protect your nail and prevent staining.
Avoid using harsh chemicals that can strip the color from your nails.
Seal in the color and prevent chipping by applying a top coat.
Be cautious when engaging in activities that could damage your nails.
Store your nail polish in a cool, dark place to prevent color fading.
By incorporating these care tips into your routine, you’ll enjoy your stunning ombre nails for an extended period.
Frequently Asked Questions
How can you create an ombre nail design at home without any special tools or skills required?
Creating bright summer ombre nails at home is easier than you might think, and the results are just as fabulous as a salon-done manicure. Here’s a simple method you can try:
Begin with a light-colored polish as your base coat and let it dry.
Apply a second coat of polish using a slightly darker shade.
Use a makeup sponge to blend the two colors until you achieve the desired ombre effect.
Finish off with a top coat for extra shine and protection.
Which colors work best for ombre nails?
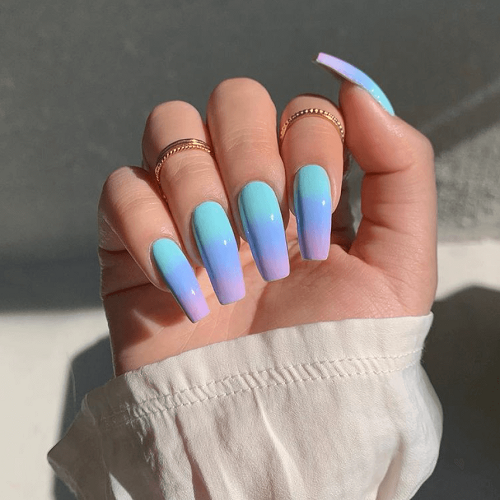
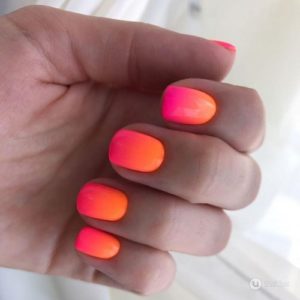
For a bright and summery look, opt for colors like pink, coral, or yellow for your ombre nails. If you prefer a more subtle style, lavender or light blue shades would be perfect. Feel free to experiment with different color combinations to create a unique look. Just remember to have the colors gradually transition from the base to the tips of your nails.
What should you avoid to achieve a professional-looking finish?
If you want your bright summer ombre nails to look professional, avoid using chipped or old nail polish. Ensure that your nails are clean and debris-free before applying polish. Use a base coat to protect your nails from staining and to help the polish adhere better. For a smooth finish, apply a top coat after the color has dried.
How can you create an ombre nail design using three colors?
To create an ombre nail design using three colors, follow these steps:
Choose a light, medium, and dark shade of polish.
Start with the lightest shade and paint your nails with a base coat.
Apply the medium shade to the tips of your nails.
Create a V-shaped design at the tips using the darkest shade of polish.
Allow your nails to dry completely before applying a top coat.
Enjoy your bright summer ombre nails!
In conclusion
Summer is the perfect time to experiment with fun and vibrant colors on your nails. Ombre nails offer a fantastic way to showcase your creativity, and they are surprisingly easy to create at home. Whether you’re new to nail art or an experienced enthusiast, the possibilities are endless when it comes to designing your own ombre nails. So why wait? Get inspired by these summer ombre nail designs and let your creativity shine. Bright summer ombre nails are calling your name!