If you’re a homeowner or frequently work with wood, you’re probably familiar with the unsightly nail holes that can detract from the beauty of your woodwork. Whether it’s a small hole from a finishing nail or a larger hole from a misplaced framing nail, these blemishes can be an eyesore. Luckily, patching nail holes is an easy process that can be done with a few basic tools and materials. In this article, we’ll provide you with a comprehensive guide on how to patch nail holes and restore your woodwork to its former glory.
Essential Tools and Materials
Before you begin patching nail holes, gather the necessary tools and materials listed below:
A putty knife
Sandpaper (with 120 and 220 grit)
Wood filler or spackling compound
Paint or stain that matches the wood
A cloth or rag
The putty knife is used to spread the filler or spackling compound into the hole, while sandpaper is essential for smoothing the wood’s surface after patching. Wood filler or spackling compound is used to fill in the hole, and paint or stain is employed to match the color of the surrounding wood. Finally, a cloth or rag is handy for wiping away excess filler and cleaning up any spills or drips. Once you’ve gathered all your tools and materials, it’s time to prepare the surface.
Proper Preparation for Patching Nail Holes
Before beginning the patching process, it’s crucial to prepare the surface properly. Start by thoroughly cleaning the area around the nail hole using a damp cloth or rag to remove any dirt, dust, or debris. Next, slightly rough up the area surrounding the nail hole with sandpaper. This step helps the filler or spackling compound adhere better to the wood’s surface. After roughing up the area, wipe it down again with a clean cloth or rag to remove any remaining dust or debris. With the surface properly prepared, you’re now ready to start patching the nail hole.
In addition to cleaning and roughing up the surface, there are a couple of extra tips to ensure a smooth finish. First, check the consistency of the wood filler or spackling compound you’re using. It should be easy to spread and fill the hole well, without being too thick or thin. Test the consistency by applying a small amount to a scrap piece of wood. Second, make sure to choose the correct color of paint or stain to match the surrounding wood. Test the color on a scrap piece of wood or an inconspicuous area before applying it to the filled nail hole.
Patching Nail Holes: Step-by-Step Guide
Now that you’ve prepared the surface, it’s time to patch the nail hole. Follow these step-by-step instructions:
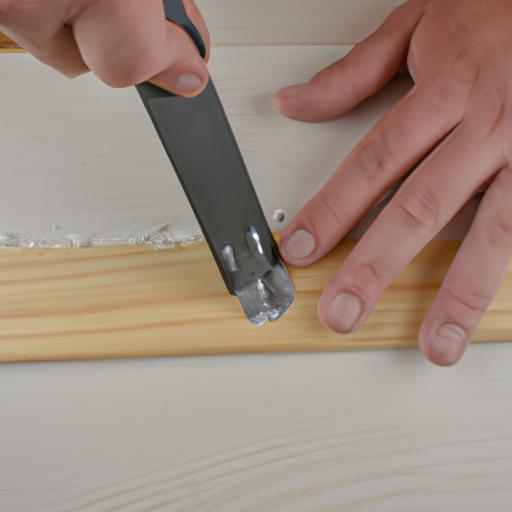
Scoop a small amount of wood filler or spackling compound onto your putty knife.
Spread the filler or spackling compound evenly over the nail hole, ensuring it’s completely filled.
Use the putty knife to smooth out the surface of the filler or spackling compound.
Allow the filler or spackling compound to dry completely according to the manufacturer’s instructions.
Once dry, use sandpaper to smooth out the surface of the wood. Start with 120-grit sandpaper and progress to 220-grit for a flawless finish.
Wipe away any dust or debris with a clean cloth or rag.
Apply paint or stain that matches the surrounding wood, using a small brush or cotton swab.
There are various methods and techniques you can use to patch nail holes. For smaller holes, colored wax pencils or putty sticks are quick and easy to use. These products come in different colors and can be found at most hardware stores. Another method is to apply wood glue to the hole using a toothpick or small brush, and then sanding it down once it’s dry. This technique is best for larger or deeper holes. Regardless of the method chosen, following these steps will ensure a seamless finish that will make your woodwork look brand new.
After patching the nail hole with wood filler or spackling compound, the next step is to sand the surface. Sanding is essential for creating a smooth and seamless finish. Start by using 120-grit sandpaper in a circular motion to sand the filled-in area until it’s level with the surrounding wood. Then, switch to 220-grit sandpaper for an even smoother surface. Be careful not to sand too aggressively, as it may damage the surrounding wood or create unevenness. Once finished, wipe away any dust or debris with a clean cloth or rag.
When the surface is clean and dry, it’s time to paint or stain the wood. If you’re painting, choose a paint that closely matches the surrounding wood. Use a small paintbrush and apply the paint to the filled-in area, being cautious not to apply too much at once. Allow the paint to dry completely before applying a second coat if needed. If you’re staining, select a stain that closely matches the surrounding wood. Apply the stain with a clean cloth or rag, ensuring an even blend with the surrounding wood. Let the stain dry completely before applying a second coat if necessary.
In Conclusion
Filling in nail holes may seem like a minor detail, but it can greatly enhance the overall appearance of your woodwork. By following the simple steps outlined in this article, you can easily patch nail holes and achieve a seamless, professional-looking finish. Remember to gather all the necessary tools and materials, properly prepare the surface, fill in the hole, sand the surface, and paint or stain the wood to match the surrounding area. With a little patience and attention to detail, you can make your woodwork look brand new again.