Are you tired of that unsightly nail sticking out of your wall or floorboards? Removing a nail may appear simple, but without the appropriate tools and techniques, it can be quite challenging. In this comprehensive guide, we will walk you through the steps of safely and efficiently removing a nail.
The Importance of Knowing How to Remove a Nail
Nails are frequently utilized in many households for hanging pictures, shelves, and other home decor items. However, over time, nails can become loose or damaged, posing a hazard to anyone who comes in contact with them. Knowing how to remove a nail is essential for preventing injuries and ensuring the safety and security of your home.
Basic Tools Needed
Before you begin removing a nail, it is crucial to have the necessary tools at your disposal. Here are some of the fundamental tools you will require:
Pliers or a claw hammer
A pry bar
Safety goggles
Work gloves
A putty knife
Sandpaper
By having these tools readily available, you will be able to remove a nail safely and efficiently. Remember, safety should always be a priority, so make sure to wear your safety goggles and work gloves to protect your eyes and hands.
Before you proceed with removing a nail, it is important to carefully assess the situation. Here are some aspects you should consider:
Types of Nails and Their Applications
Various types of nails serve specific purposes. For instance, finishing nails are used for trim work, while roofing nails are employed in roofing projects. Understanding the type of nail you are dealing with will help you determine the most appropriate technique for its removal.
Determining the Nail’s Condition
Before removing a nail, evaluate its condition. Is it loose or firmly in place? Is the nail head damaged or intact? These factors will determine the best method for removing the nail.
The Importance of Safety Precautions
Removing a nail can be hazardous, especially if you neglect necessary safety precautions. Always remember to wear safety goggles and work gloves, and ensure that the area surrounding the nail is free of any debris or obstacles.
Preparing to Remove the Nail
Once you have assessed the situation, it is time to prepare for removing the nail. Here are a few essential steps you should take:
Gathering Materials
Before you commence nail removal, gather all the necessary materials. These include pliers or a claw hammer, a pry bar, a putty knife, and sandpaper. Having these tools readily available will streamline the nail removal process.
Identifying the Nail’s Location
Precisely identifying the location of the nail is crucial for its successful removal. If the nail is concealed behind a wall, you might need to use a stud finder to locate it. Once you have found the nail, mark its position with a pencil.
Before removing the nail, ensure that the surrounding area is clear of any debris or obstacles. This will provide you with ample space to work and prevent any accidents.
Removing the Nail
Now that you are adequately prepared, it is time to start removing the nail. Here are a few techniques you can employ:
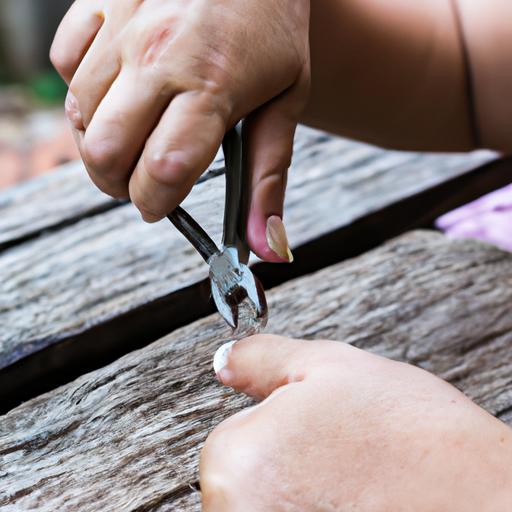
Using Pliers
If the nail is small and has a visible head, pliers can be used for its removal. Grip the nail head with the pliers and gently pull it out of the wood. In case the nail is firmly in place, you might need to wiggle it back and forth to loosen it.
Using a Claw Hammer
Another tool that comes in handy for removing a nail is a claw hammer. Position the hammer’s claw under the nail head and leverage it out of the wood. If the nail is stuck, tap the hammer gently to loosen it before levering it out.
Using a Pry Bar
For larger nails firmly embedded in place, a pry bar is often necessary. Position the pry bar under the nail’s head and leverage it out of the wood. If the nail is stuck, gently tap the pry bar to loosen it before levering it out.
By utilizing these techniques, you can safely and efficiently remove a nail. Always remember to take the necessary safety precautions and wear protective gear to prevent any potential injuries.
Cleaning the Surface
Once the nail has been removed, thoroughly clean the surface. Follow these steps:
Removing Nail Remnants
After removing the nail, you may be left with small pieces or splinters in the wood. Use a putty knife to gently scrape away any remaining pieces. If there are any stubborn remnants, employ sandpaper to smooth them out.
After removing the nail and any remnants, it is essential to smooth out the surface. Sandpaper is a useful tool for this task as it helps eliminate bumps or imperfections. Remember to sand the surface gently to avoid damaging the surrounding wood.
Preparing for a New Nail
If you intend to replace the nail, ensure that the surface is adequately prepared. Clean the area thoroughly, removing any debris or nail remnants. Additionally, use wood filler to fill any holes or gaps before inserting a new nail.
Conclusion
Removing a nail may appear simple, but it can prove to be challenging without the right tools and techniques. By following the steps outlined in this comprehensive guide, you can safely and efficiently remove a nail. Always prioritize safety by wearing safety goggles and work gloves, and take the necessary precautions.
To recap, the steps to remove a nail are as follows:
Assess the situation
Gather the necessary tools
Remove the nail using pliers, a claw hammer, or a pry bar
Clean the surface by removing nail remnants, smoothing the surface, and preparing for a new nail
By following these steps, you will be able to remove a nail with ease. Remember, safety should always be your top priority, so take the necessary precautions to protect yourself and those around you.