Nail art has gained immense popularity as a means of expressing individuality through appearance. Among the many nail art options available, cherry blossom nail art stands out as one of the most sought-after styles. This versatile and visually appealing design can be adapted to complement any outfit or mood. In this article, we will guide you through the process of creating your own cherry blossom nail art and provide tips to help you achieve the best results. Let’s dive in!
What is Cherry Blossom Nail Art?
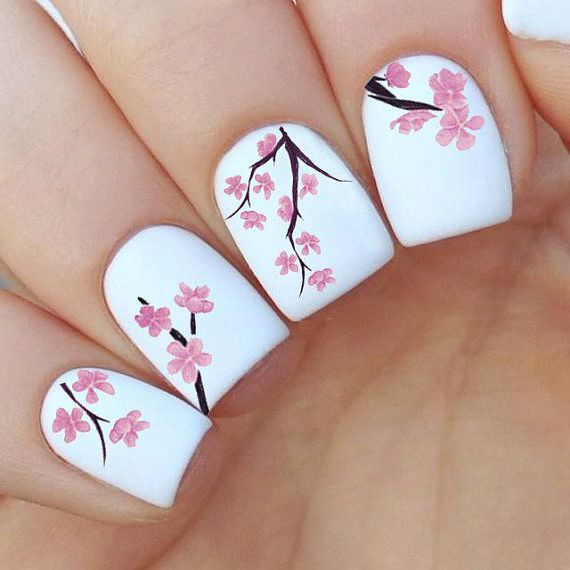
Cherry blossom nail art showcases the elegance of cherry blossoms, a cherished symbol in Japanese culture. This art form can be achieved using various techniques, including painting, airbrushing, and decals. While cherry blossom designs are typically white or pink, other colors can also be used to infuse creativity into the art.
Why is Cherry Blossom Nail Art So Popular Right Now?
Cherry blossoms hold deep cultural significance in Japan. Incorporating this symbol into your appearance through cherry blossom nail art has become a popular trend. With numerous online tutorials and magazine features available, anyone can try their hand at this art form. The association of cherry blossoms with springtime and the allure of their beautiful colors contribute to the current popularity of this nail art style.
How to Create Cherry Blossom Nails at Home: A Step-by-Step Guide
The delicate petals and gentle hues of cherry blossoms make them a captivating choice for nail art. Follow these simple steps to create your own cherry blossom nails:
Apply a base coat of white polish to your nails to enhance the vibrancy of the cherry blossom colors.
Once the base coat is dry, use a small brush to paint the cherry blossoms. Start with the lightest color and gradually add darker shades.
For added dimension, use a dotting tool to create small dots in the center of each blossom.
Finish off your cherry blossom nails by applying a top coat of clear polish. And voila! You’ve created a stunning cherry blossom nail design.
Different Ways to Style Cherry Blossom Nails
Cherry blossoms offer versatility in nail art, ranging from delicate to bold designs. Here are some creative ways to style your cherry blossom nails:
For a subtle look, paint only the tips of your nails with cherry blossoms. This option is ideal for work or school settings.
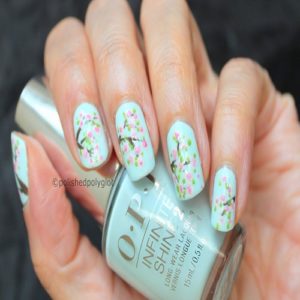
Achieve a more dramatic effect by painting your entire nail with cherry blossoms. Experiment with a gradient effect by fading the flowers from white to pink.
Add some sparkle and make your cherry blossom nails stand out by incorporating glitter or rhinestones.
Take your creativity to the next level by painting cherry blossoms on your toes. Showcase your nails with pride while wearing sandals or open-toed shoes.
Essential Products and Tools for Creating Cherry Blossom Nail Art
To create beautiful cherry blossom nail art, you’ll need the following products:
These simple tools and materials are all you need to bring your cherry blossom nail art to life!
Start by painting your nails with a base color of your choice. Once dry, use cherry blossom stamps to create a subtle design on each nail. Alternatively, you can use a dotting tool or toothpick to add small dots. Allow the cherry blossom design to dry completely before applying a top coat for a long-lasting finish.
FAQs
How to Create the Perfect Cherry Blossom Nail Art Look?
Follow these steps to achieve an impeccable cherry blossom nail art look:
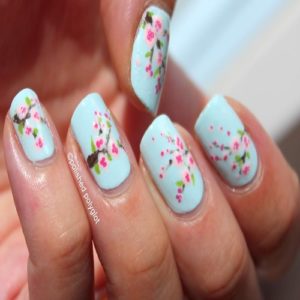
Begin by painting your nails with a light pink polish as the base color. Ensure the polish is completely dry before proceeding.
Once the base color is dry, use white polish to create cherry blossoms on each nail. Start with small dots at the center of each blossom and add petals around them.
To complete the look, paint green leaves around the cherry blossoms. Allow everything to dry thoroughly before applying a top coat of clear polish.
Tips for Maintaining and Extending the Lifespan of Your Nail Art
To ensure the longevity of your cherry blossom nail art, follow these tips:
Clean your nails thoroughly and remove any oils or dirt before starting the nail art process. This will enhance the adhesion of the polish and prolong its lifespan.
Opt for high-quality nail polish for your cherry blossom design. Good-quality polishes are more durable and less prone to chipping.
Avoid applying an excessive amount of top coat, as it can cause the cherry blossoms to lose their shape and color.
Enhance the vibrancy of your cherry blossom nail art by using a white base coat before applying the polish. This will make the colors stand out and give your nails a vibrant look.
Seal your finished cherry blossom nail art with a top coat to protect it and keep the design looking fresh for an extended period.
With the arrival of spring, cherry blossoms grace the environment with their beauty and elegance. You can channel this seasonal inspiration into your nail art. Explore the amazing examples of cherry blossom nail art for creative ideas that will add fun and color to your look.
Our cherry blossom nail art tutorial offers a quick and easy way to achieve stunning results. This customizable design suits various outfits and occasions, making it a perfect choice for special events or everyday wear. Ready to try it out? Follow our simple steps to create beautiful cherry blossom nails within minutes. If you have tried this nail art before or have other design requests, let us know in the comments below!