Dogs are cherished members of our families, and ensuring their health and grooming is essential for their overall well-being. One aspect of dog grooming that can be challenging for pet owners is nail clipping. However, regular nail trimming is vital to prevent discomfort, pain, and potential infections caused by long nails. Guillotine dog nail clippers have become a popular choice for this task, but it’s crucial to use them correctly to avoid hurting your furry friend. In this comprehensive guide, we’ll walk you through the step-by-step process of effectively using guillotine dog nail clippers.
Understanding Guillotine Dog Nail Clippers
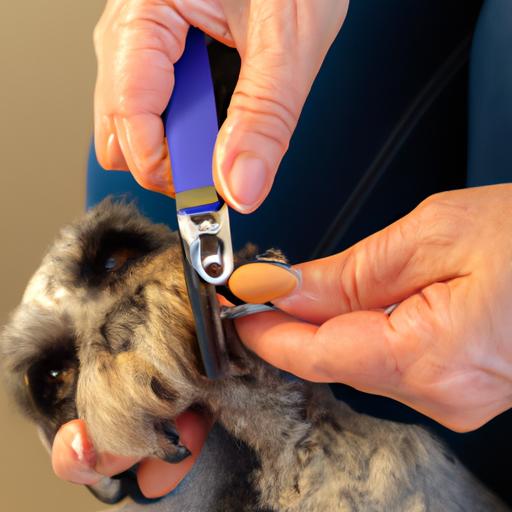
Guillotine dog nail clippers consist of a handle, a stationary ring to insert the nail, and a cutting blade that slides across the ring to trim the nail. These clippers are best suited for small to medium-sized dogs with thin nails. Large dogs with thick nails may require a different type of clipper with more cutting power.
Before using guillotine clippers, it’s important to familiarize yourself with their different parts. The cutting blade plays a crucial role and should always be kept sharp to avoid causing pain or discomfort to your dog. The stationary ring is where you insert your dog’s nail, so it’s important to choose the correct size to prevent any pain or injuries. Properly holding your dog’s paw while using the clippers is also essential in preventing any unwanted movement during the clipping process.
Many dogs have a fear of nail clipping, so it’s important to create a positive experience for them. Start by introducing the clippers to your dog and allowing them to sniff and investigate them. Offering a treat at this stage can help create a positive association with the clippers.
Once your dog is comfortable with the clippers, it’s time to prepare their nails for trimming. Begin by identifying the quick, which is the blood vessel inside the nail. This is crucial in order to avoid cutting it, as it can cause pain and bleeding. For dogs with light-colored nails, the quick is easily visible. However, for dogs with dark-colored nails, you may need to trim a small amount of the nail at a time until you see a small black dot in the center, indicating the start of the quick. At this point, you should stop trimming to avoid any potential harm.
Steps to Using Guillotine Dog Nail Clippers
Using guillotine dog nail clippers may seem challenging at first, but with practice, it becomes a straightforward process. Here’s a step-by-step guide to ensure safe and effective nail clipping:
Step 1: Positioning Your Dog
Find a comfortable and secure spot for your dog.
Gently but firmly hold their paw to prevent any movement during the process.
Ensure you have good lighting to clearly see the nail.
Step 2: Identifying the Quick
For light-colored nails, the quick will appear as a pinkish area inside the nail.
For dark-colored nails, trim a small amount at a time until you see a small black dot in the center of the nail, indicating the start of the quick.
Insert your dog’s nail into the stationary ring of the clipper.
Ensure the clipper is perpendicular to the nail.
Gently squeeze the handle to cut the nail.
If you’re unsure about the correct pressure, start by cutting off a small amount of the nail at a time.
If the nail splinters, adjust the angle slightly and try again.
By following these steps, you’ll be able to safely and effectively use guillotine dog nail clippers, ensuring your dog’s comfort and health.
Post-Clipping Care
After clipping your dog’s nails, it’s important to take care of their paws. Smooth any rough edges or sharp points using a nail file or grinder. This prevents your dog from scratching themselves or damaging furniture.
If you accidentally cut the quick and your dog’s nail starts to bleed, act promptly to stop the bleeding. Dip your dog’s nail in cornstarch or styptic powder. If the bleeding persists or your dog seems to be in pain, contact your veterinarian for further assistance.
Lastly, reward your dog for their good behavior during the nail clipping process. Offer treats or praise to create a positive association with nail clipping. This will make future clipping sessions easier and ensure your dog remains happy and healthy.
Conclusion
In conclusion, using guillotine dog nail clippers is a simple and effective way to keep your dog’s nails healthy and comfortable. By understanding the different parts of the clipper, preparing your dog for the process, and following the correct steps, you’ll be able to safely and effectively trim your dog’s nails. Take care of your dog’s paws after clipping and reward them for their cooperation. With practice and patience, nail clipping will become a stress-free and positive experience for both you and your furry friend.